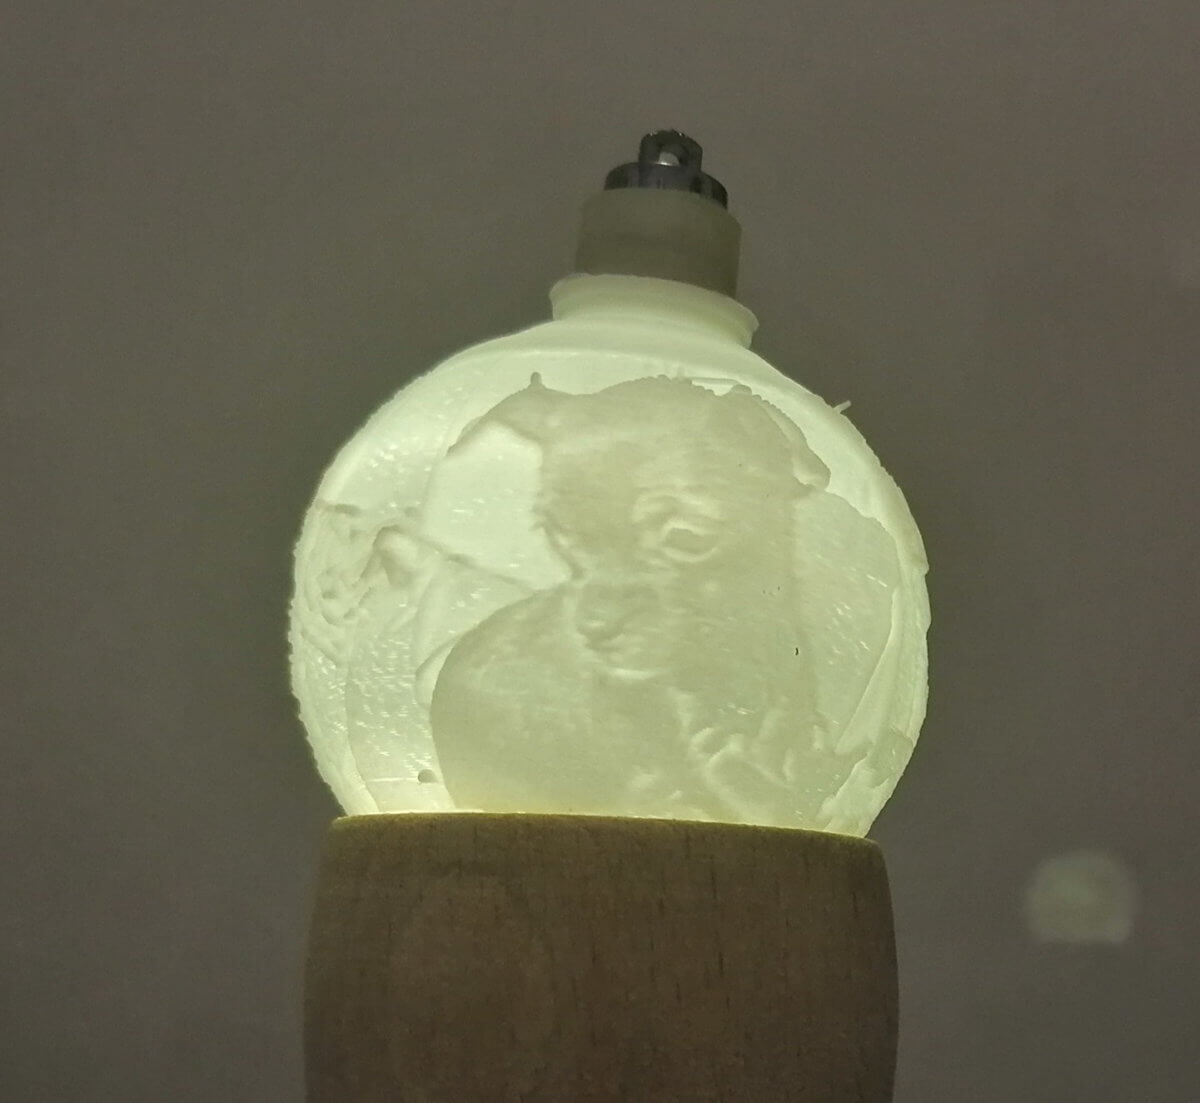
If you have a 3D printer or have access to a reliable 3D printing service, this guide will help you make very cool Christmas tree ball decoration. The process is easy and the end result is awesome.
I actually wanted to make this post before Christmas 2019, first tests and notes came from late November 2019 but I really could not find the time to wrap up everything. But let’s look at the half full glass: now you have almost one year to prepare for Christmas 2020!
But let’s not write an huge irrelevant intro, like kitchen blogs do, and let’s go ahead.
What will you need for this guide?
- The image you want to impress. I recommend a 4:1 ratio.
- This online lithophane generator
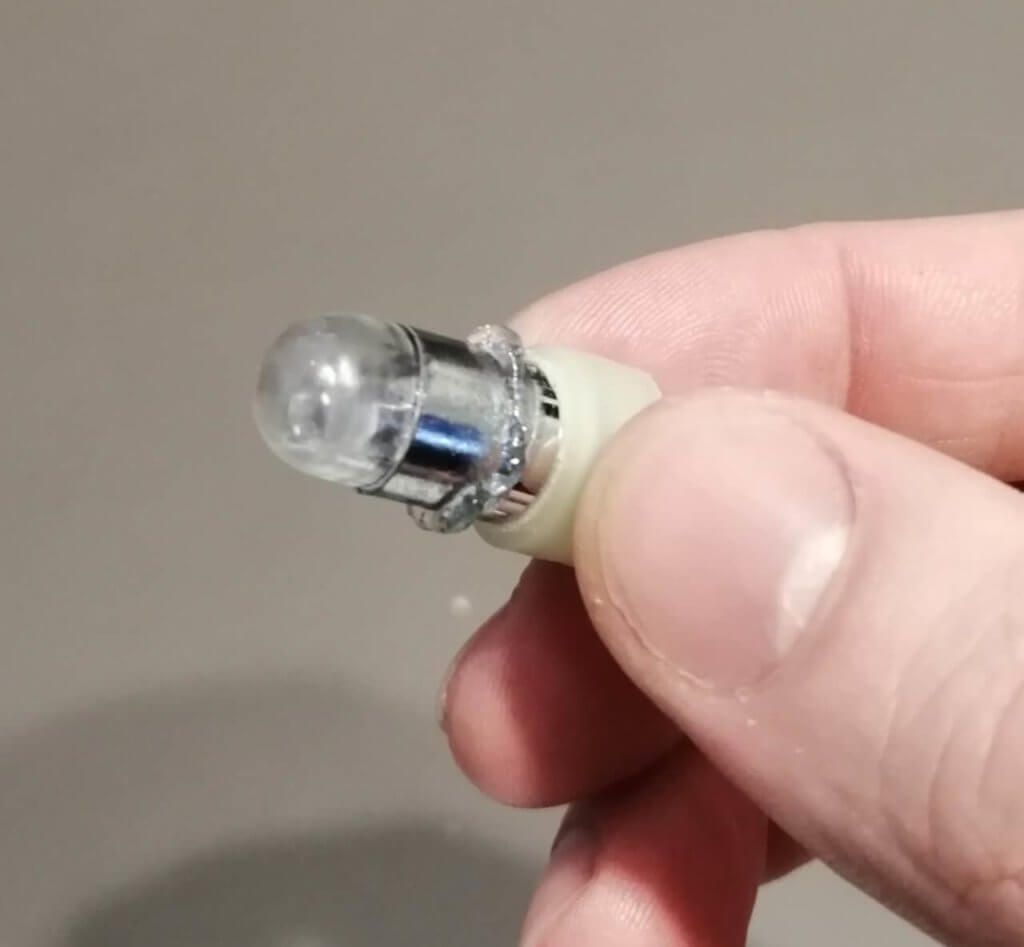
- Those lights. Link is the exact one I bought from Amazon Italy, but you can find them wherever
- A bit of thick glue
- A Christmas ornament hook or a string
That’s it.
First step: The image
Ok, so now we start by preparing an image. I recommended a 4:1 ratio for the image for a full loop around the sphere, the generator will wrap it 360 degrees horizontally and 90 degrees vertically. Since no camera have this weird ratio, I strongly suggest making photo collage, here’s an example using my two good girls: Ariel and Isabel.

Second step: Lithophane sphere generation
Now the next step is generating our lithophane. Head over to the site and start by uploading the image.
Now since an image is worth a thousand words, here’s a screenshot of what settings you will need.
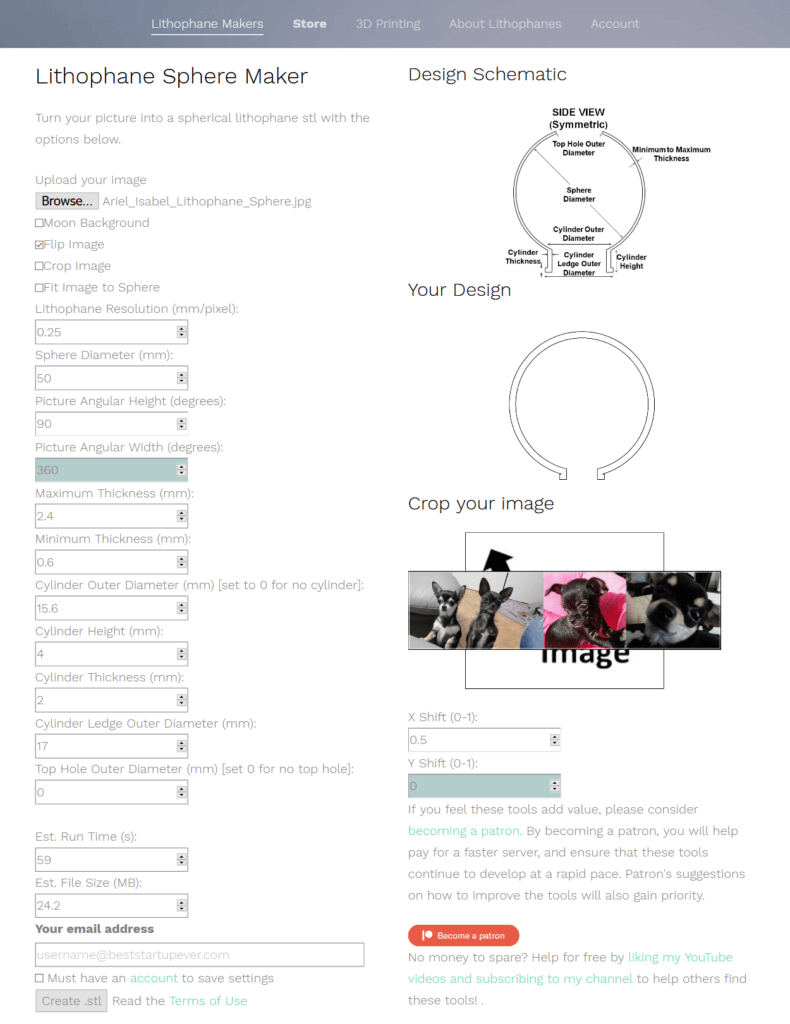
Remember to check Flip Image, as the is made for bedside lamps and we are printing one upside down.
You should copy everything from the screen, only edit Sphere Diameter if you want a bigger one, but I found 50 to 75 mm to have the best result with our tiny lights, and Cylinder Outer Diameter to better fit your printer tolerances. Better explanation: There’s no inner diameter setting, instead it is calculated from Cylinder Outer Diameter minus two times Cylinder Thickness (making it 11.6 inner in this case), the lights are 11-11.2 mm wide, but I left some tolerance to compensate for printing errors and for easier fitting.
After you set up the values, press Create .STL and wait a minute for the download to generate.
Third step: 3D Printing
When comes to printing, lithophanes should be printed solid and require some specific settings. Here’s what you have to set in Cura:
- Layer Height: should be a good quality one, I use 0.12mm. Do not use huge layers for smaller ornaments or the image will be grainy.
- Bottom Layers: set it to something like 99999
- Infill: 100%
- Build plate adhesion: I use a 20mm thick brim for a 50mm sphere, use 30-35 for a 75mm sphere, you don’t want the print to fall down.
- Print slower. Some people suggest to print super slow, like 15mm/s. I think you should print them at 50-75% of your regular speed (eg. 30 to 45 if you usually print at 60mm/s). The one I show in this guide was printed at 120mm/s on a cheap Ender 3 and still looks ok.
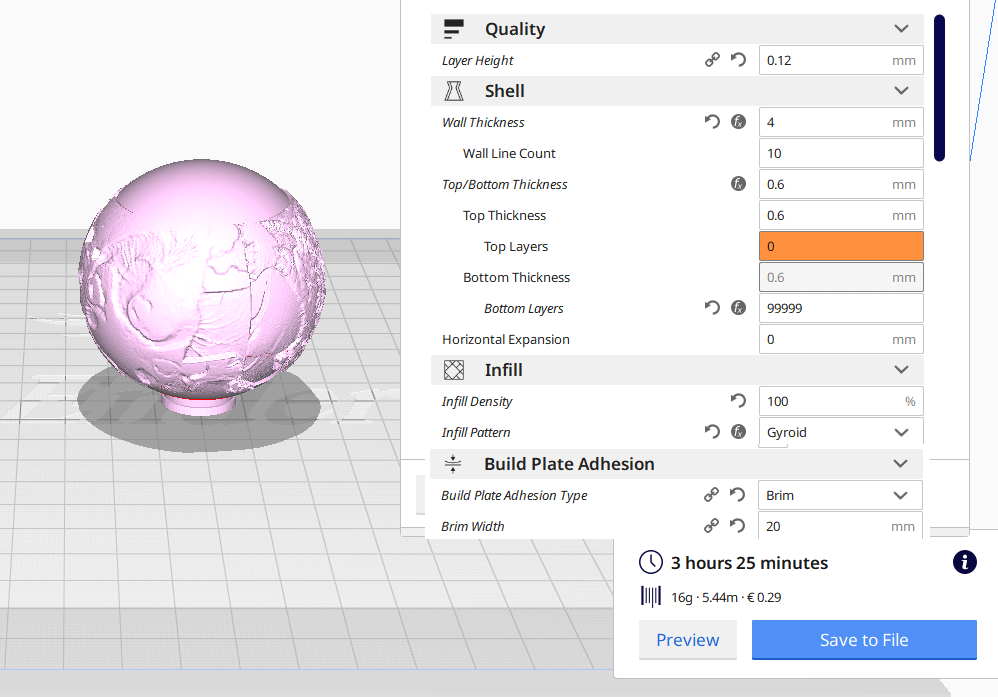
Note: If you use a 3D printing service, make sure you tell them you want a 100% solid item like this, having an infill will blur or mask out parts of the image.
Now slice that file and print it, you should print it using white PLA, other colors may block too much light.
Fourth Step: final touches
Grab one light, put on a ring of glue and place it inside the hole, you can use the silicon ring as stop to let the light sit in position. Store it somewhere where it can’t roll and let it dry overnight.
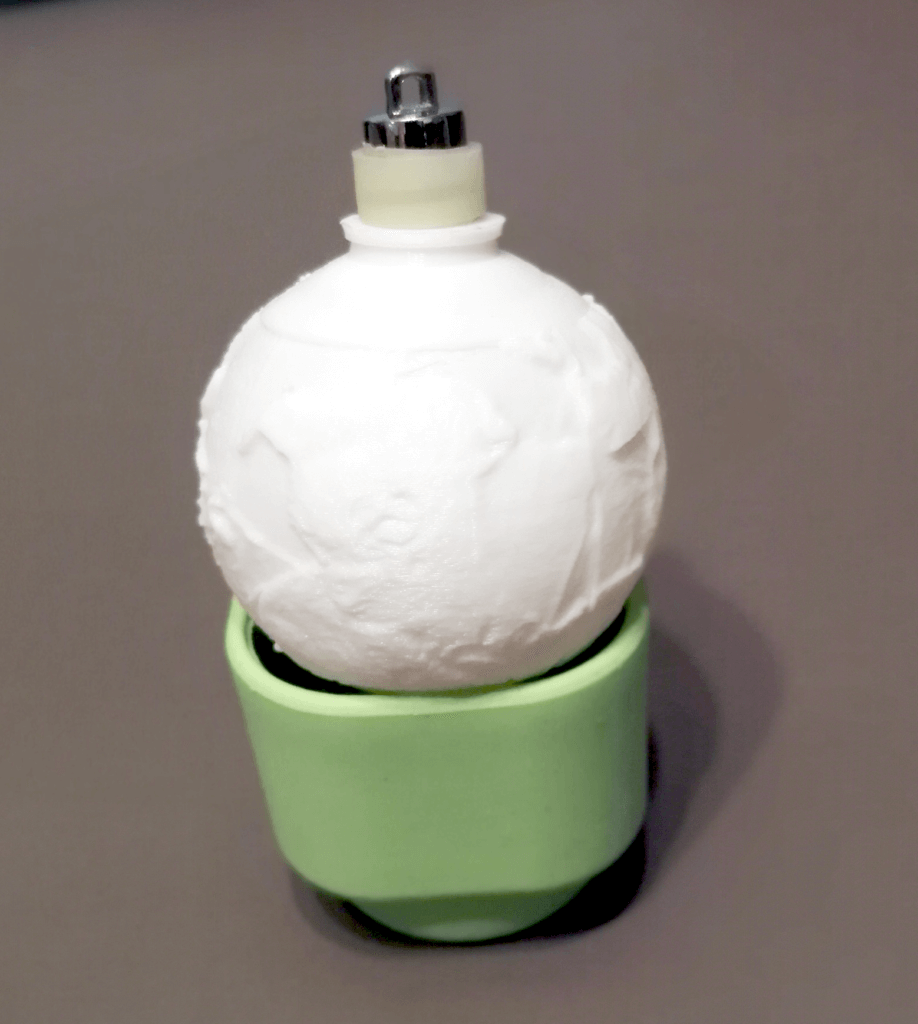
For the last touches add a small ornament hook or a piece of string.
Fifth Step: Done!
Look at that! Now your print is ready to hang. Remember to fully unscrew cap and remove the battery protection, then screw/unscrew to turn it on/off.

